Sourdough baking 101
I actually jumped on the sourdough bandwagon way back in middle school.
My granny, having Norwegian blood in her, used to make slow-rise rye bread over the weekends. It was the best thing we knew, and a big rival to the Sunday roast at our dinner tables. She got us all involved, and by the time I was in middle school, I had a solid understanding of sourdough baking, whether I liked it or not.
It was interesting to notice has slowly but then all of a sudden, sourdough became the new trending thing in the world of food blogs. First, the hipsters were making it, and suddenly every second blogger I knew had their sourdough FAQs sections available for the sourdough-thirsty public. So, while I’m technically late to the sourdough craze, rest assured that I’ve been at it since I was 13 years old.
My granny has two main rules she would go by: use your flour sparingly, and never rush the dough. Sourdough is meant to be moist and it’s not something you can whip up in a matter of minutes.
Norwegian Sourdough Bread Recipe
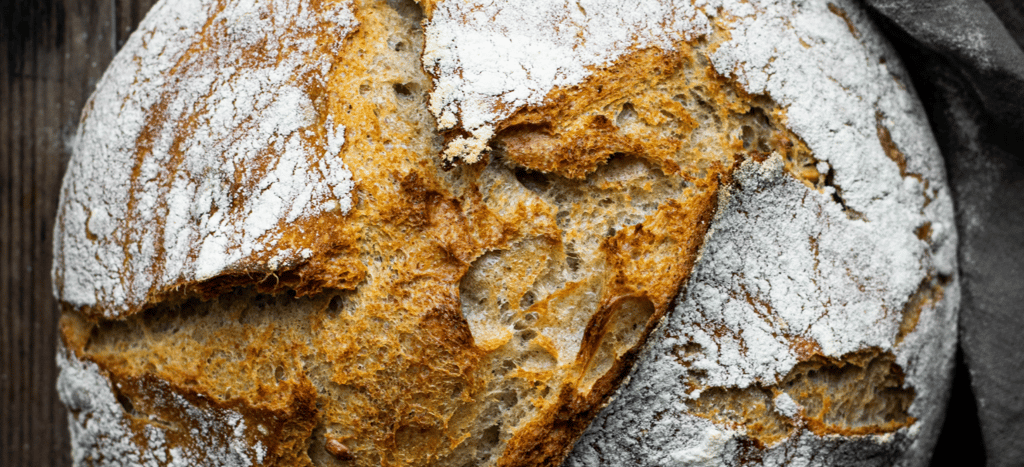
Norwegian sourdough bread (known as surdeigsbrød) is known for its hearty texture and slightly tangy flavor, thanks to the natural fermentation process. This recipe will guide you through making a delicious homemade Norwegian-style sourdough bread, with a crusty exterior and soft, airy crumb.
Ingredients:
For the Starter:
100g whole wheat flour
100g water (room temperature)
1 tablespoon sourdough starter (if you don't have one, you can make your own or use store-bought)
For the Dough:
500g bread flour (you can use a mix of white and whole wheat flour)
300g water (room temperature)
10g salt
1 tablespoon honey or sugar (optional, for slightly sweet flavor)
200g sourdough starter (from your previous step)
Directions:
Step 1: Preparing the Starter (Feed the Sourdough)
Day 1: In a medium-sized bowl, combine 100g of whole wheat flour and 100g of water. Stir it into a smooth paste. Cover the bowl with a cloth or plastic wrap and leave it at room temperature (ideally 70°F/21°C) for 24 hours. This is the first day of building your sourdough starter.
Day 2 and Beyond: On the second day, discard half of your starter mixture and feed it with 100g of water and 100g of whole wheat flour. Stir to combine and leave it to ferment for another 24 hours. Repeat this process for 4-5 days until your starter is bubbly, has a tangy smell, and is ready to use.
Step 2: Mix the Dough
In a large mixing bowl, combine 500g of bread flour and 300g of water. Mix until all the flour is hydrated. Let it rest for 30 minutes. This resting period (called the autolyse) helps develop gluten and improve texture.
After 30 minutes, add your 200g of sourdough starter, 10g of salt, and honey (if using). Mix until everything is well incorporated. You should have a sticky, shaggy dough.
Step 3: Knead the Dough
Transfer the dough to a lightly floured surface and knead it for about 10-12 minutes. The dough will be sticky at first, but it will become smoother and more elastic as you knead. If the dough is too sticky, add small amounts of flour as needed.
Alternatively, you can knead the dough using the "stretch and fold" method: Every 30 minutes for the first 2-3 hours, stretch the dough from one side, fold it over itself, rotate the bowl, and repeat. This helps build the gluten structure without overworking the dough.
Step 4: Bulk Fermentation
Once the dough is well-kneaded, place it back into the mixing bowl, cover it with a damp cloth or plastic wrap, and let it rise at room temperature for 4-6 hours or until it has doubled in size. The exact time will depend on the ambient temperature and the strength of your starter.
Step 5: Shape the Dough
After the dough has risen, gently punch it down to release excess air. Turn the dough out onto a lightly floured surface and shape it into a round or oval loaf. To shape, fold the edges of the dough inward, creating tension on the top surface. Then flip it over so the seam is on the bottom.
Alternatively, you can shape it into a loaf to fit your bread pan.
Step 6: Proofing
Once shaped, place the dough in a well-floured proofing basket or a bowl lined with a clean towel. Cover and let it proof for an additional 3-4 hours. You can also refrigerate it overnight for a slow rise, which will develop more flavor.
Step 7: Preheat the Oven
About 30-40 minutes before you're ready to bake, place a Dutch oven or heavy pot with a lid in the oven and preheat it to 450°F (230°C). The hot pot creates a steamy environment that helps the bread develop a beautiful, crispy crust.
Step 8: Bake the Bread
Once the dough has proofed, carefully remove the preheated pot from the oven. Gently flip the dough into the pot, seam side up. Use a sharp knife or razor blade to make a few slashes on the top of the dough.
Cover the pot with its lid and bake for 30 minutes. Then, remove the lid and continue baking for another 15-20 minutes, until the bread is golden brown and the crust is crispy.
Step 9: Cooling
Once baked, carefully remove the bread from the pot and let it cool on a wire rack for at least 1 hour before slicing. This allows the crumb to set and improves the texture.
Enjoy your homemade Norwegian sourdough bread!
This bread is perfect with butter, cheese, or served alongside soups and stews. It also makes fantastic sandwiches.